
1. In the CommCell Console, locate the vCenter Server that hosts the VM you need restored. Once found, expand the vCenter Server until you see the “defaultBackupSet”. Right-click on the “defaultBackupSet” and choose “Browse and Restore” under “All Tasks”.

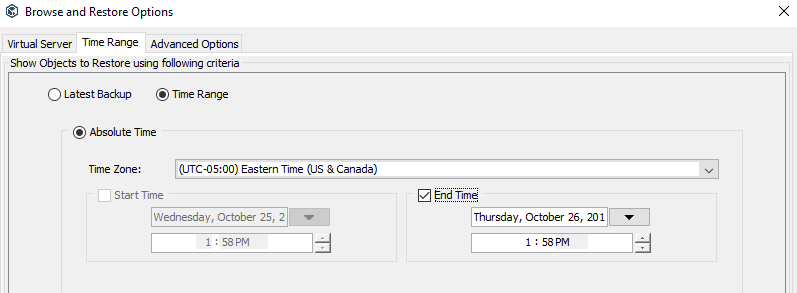
2. On the Time Range Tab, select the time range you would like to restore from. Leave “Latest Backup” selected for the last backup taken.
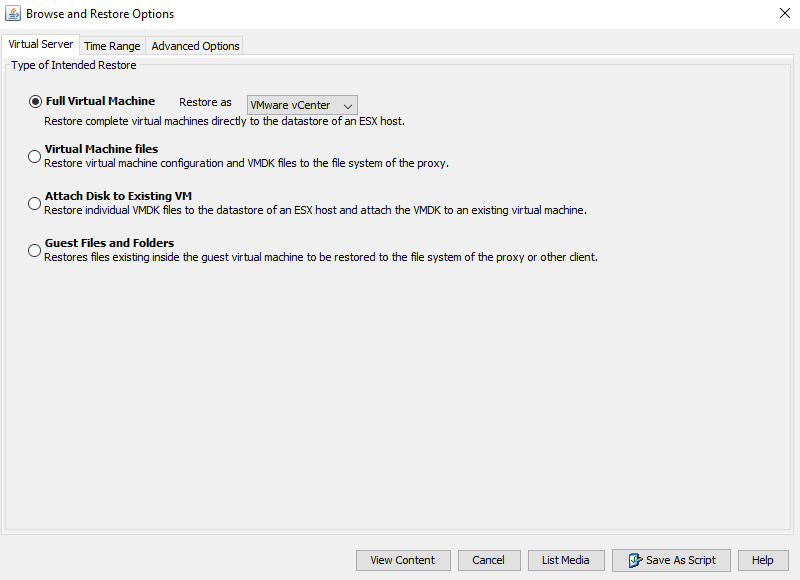
3. On the Virtual Server tab, select the “Full Virtual Machine option” and click “View Content”. If you only want to restore files or folders click here.
4. Select the Virtual Machine that you need to restore and then click “Recover All Selected…”.

Note: This will not start the recovery process.
5. Configuring Restore Type:
- In Place Restore will overwrite the existing Virtual Machine. Leave the box for “In Place” checked.
- Out-of-Place Restore will create a new separate Virtual Machine for the restore. Please uncheck the “In Place” box.
- Choose the desired restore type then click Next.
Note: We suggest to always use Out-of-Place restores. In Place restores should only be used when you have very limited resources.

6. Configuring the New Virtual Machine (Out-of-Place Restore)
Note: If you selected an In Place restore, all the options specified in this step will be grayed out. Simply click Next and proceed to step 7.
- Name the new Virtual Machine that you will be restoring in the “Change VM display name to” field.
- To change which ESX Server you restore to, click on the prepopulated ESC server name and then select the “…” box. You will now be able to browse to your desired ESX server.
- To change the Datastore, click the dropdown on the prepopulated Datastore and select the desired one. (Changing the Datastore on the top will change all other Datastores for the VM to the same one.)
- Once all settings are configured, click Next.

7. If you leave all options as default on the Restore Options page, the restored VM will need manually powered on after the restore is completed.
-
- If you would like the restored Virtual Machine to Power On as soon as it finishes, check the box for “Power ON Virtual Machine after Restore”.
- If you are doing an In Place restore, check the box for “Unconditionally Overwrite VM with the same name”. This setting will make the new VM OVERWRITE the previous server with the same name.
- In some cases, we also have the ability to bring the server up within minutes by using Live Recovery (this requires that you have at least 2 Datastores). If you would like to do this, check the boxes for “Restore Virtual Machine using Live Recovery (vMotion)” and “Power ON Virtual Machine during Restore”.
- The “Redirect Writes to Database” option must be set to use a different Datastore than was selected in step 6. This is so the VM can write changes to a secondary Datastore while the restore completes. Once it does, a storage vMotion will migrate the VM to the datastore specified in step 6.
Note: While a Live Recovery restore is in progress, the Virtual Machine might be slow, but it will be up and running.
- Click Next once your desired Restore Options are set.

8. For the Job Initiation option, leave this as default to run the job immediately. If needed, you can schedule when you would like the restore to begin. Once set, click Next to view the Summary.

9. When viewing the summary, ensure that all settings listed are correct. If needed, you can go back and adjust any settings.
- In Place Restore: Confirm that “In Place” and “Overwrite Existing Virtual Machine” are set to “Yes”.
- Out-of-Place Restore: Confirm that “In Place” and “Overwrite Existing Virtual Machine” are set to “No”.
- If performing a Live Recovery or if you have the restored Virtual Machine set to power on once the restore is finished, ensure that “Power ON Virtual Machine” is set to “Yes”.
- Once you click “Finish”, the restore will begin immediately unless otherwise specified in step 8.

If you require any assistance you may contact us at: 1-(844)-4MAGNA5 x1